Sunday, December 14, 2008

Challah

I know this may seem like a sin, but I had never had Challah bread until I met my husband who just happens to be Jewish.  Year's ago when we started dating, it didn't take me long at all to fall in love with some of his family's traditional holiday food.  Challah has to be at the top of the list as one of my favorites though.  
Since Greg and I have been together for over eight years, I have spent many Jewish holiday's with his family and traditionally they had store bought challah.  When Greg and I moved away for a couple of year's, I wanted to make sure that he was still able to have his traditional food when the holiday's rolled around, so I taught myself how to make some of the dishes.  When it came to the challah, I bought the frozen dough and made it that way.  It was very yummy and it seemed a bit more homemade to me than the store bought version.  
Well, this past year I decided that I was going to take a stab at making homemade challah and bring it to his mom's house for everyone to "hopefully" enjoy.  I was able to get a wonderful recipe from the blog, It's Melissa's Kitchen.  Hers looked beautiful and I was hoping that I would be able to make something that looked at least half as good.  So with my fingers crossed I headed into the kitchen for my attempt at challah.
Mine didn't turn out quite as perfect looking as hers did, but for my first attempt I was pretty impressed and happy with the way that it did turn out!  Luckily it tasted great too and was a big hit with the family.  His grandmother still compliments me on the challah and how she can't wait to have it again.


Fresh Baked Challah
3-3 1/4 cups unbleached all-purpose flour, plus extra for dusting
1/4 cup sugar
1 envelope instant or rapid-rise yeast
1 1/4 tsp. salt
2 large eggs plus 1 large egg yolk
4 tbs. (1/2 stick) unsalted butter, melted
1/2 cup plus 1 tbs. warm water (about 110 degrees)
1 large egg white (for the egg wash)

Whisk together 3 cups of flour, sugar, yeast, and salt in a medium bowl; set aside.  Mix together 2 eggs, egg yolk, melted butter and 1/2 cup of water in bowl of standing mixer fitted with the dough hook (note: I did not have a stand mixer at the time and made this recipe fine without it).  Add flour mixture to the wet mixture.  Knead at low speed until dough ball forms, about 5 minutes, adding remaining 1/4 cup flour, 1 tablespoon at a time, as needed to prevent dough from sticking.  Whisk the reserved egg white with remaining 1 tbs. water in a small bowl, cover with plastic wrap and refrigerate.

Transfer dough to a very lightly oiled large bowl, turning dough over to coat with oil.  Cover with plastic wrap and let rise in a warm place until doubled in size, 1 1/2 to 2 hours.  
Gently press dough to deflate, cover with plastic wrap and let rise until doubled in size again, 40 to 60 minutes.

Lightly grease a large baking sheet and set aside.  Transfer dough to a lightly floured work surface.  Divide dough into 2 pieces, one roughly half the size of the other.  (Small piece will weigh about 9 ounces, larger piece about 18 ounces).  Divide large piece into 3 equal pieces. Roll each piece into a 16-inch long rope, about 1 inch in diameter.  Line up ropes of dough side by side and pinch ends together.  Proceed to  braid the three ropes together, then pinch ends to seal.  Place braid on baking sheet.  Divide smaller piece of dough into 3 equal pieces.  Roll each piece into a 16-inch long rope, about 1/2 inch diameter.  Braid together, pinching ends to seal. Brush some egg wash on top of larger loaf and place small braid on top of the larger braid. Loosely drape loaf with plastic wrap and let rise in a warm place until loaf becomes puffy and increases in size by a third, 30 to 45 minutes.

Adjust oven rack to the lower-middle position and heat oven to 375 degrees.  Brush loaf with remaining egg wash.  Bake until loaf is golden brown and instant-read thermometer inserted into side of loaf reads 190 degrees, 30 to 40 minutes.  Place baking sheet on wire rack.  Cool loaf completely before slicing.

Tuesday, November 11, 2008

Guilt Free Brownies

There is no denying that Greg and I love sweets.  I tend to be more of the dessert person (i.e. cakes, pastries, etc.) while Greg prefers candy and ice cream.  He isn't much of a cake person, but he loves cookies and brownies.  So, that brings me to our dilemma....if there are sweets in the house, we will eat them!  Unfortunately our waistlines don't enjoy the treats as much as our taste buds do.
Thankfully there is this wonderful website/magazine called Cooking Light that lets us feed our sweet tooth without increasing our clothing size.  I frequent this site quite a bit to find healthy or at least semi-healthy treats.  I wanted to make brownies but I wanted something a bit different.  When I came across the Raspberry-Cream Cheese Brownies I knew I found a winner. Chocolate and raspberry are a match made in heaven and then you add cream cheese.....what more could you want?
These were definitely a winner and there is no doubt I will make them again.  The best part....they are delicious and I don't even have to feel guilty while indulging.


Raspberry-Cream Cheese Brownies
Filling:
1/3 cup sugar
1/3 cup (3 oz.) 1/3 less fat cream cheese, softened
2 tsp. all-purpose flour
1/2 tsp. vanilla extract
1 large egg white

Brownies:
Cooking Spray or Parchment Paper
3/4 cup all-purpose flour
1/4 tsp. baking powder
1/4 tsp. baking soda
1/8 tsp. salt
1 cup sugar
2/3 cup unsweetened cocoa
1/4 cup of butter or stick margarine, melted
1 tbs. water
1 tsp. vanilla extract
1 large egg
2 large egg whites
3 tbs. raspberry preserves

Preheat oven to 350 degrees.

To prepare the filling, mix the first 5 ingredients at medium speed of a mixer until well blended, then set aside.

To prepare the brownies, coat the bottom of an 8 inch baking pan with cooking spray (I prefer to line the pan with parchment paper for easy release).  Lightly spoon 3/4 cup flour into dry measuring cups, and level with a knife.  Combine flour, baking powder, baking soda and salt in a medium bowl.  Combine (in another bowl) 1 cup sugar with cocoa, butter, water vanilla extract, egg and egg whites, mixing until smooth.  Add the flour mixture to the wet ingredients, stirring just until moist.  Spread 2/3 of the mixture into the bottom of the prepared pan.  Pour the cream cheese filling over the batter, spreading evenly.  Carefully drop the remaining batter and raspberry preserves by spoonfuls over the filling.  Swirl together using the tip of a knife to make a marble effect.

Bake at 350 degrees for 40 minutes or until a toothpick inserted in the center comes out almost clean.  Cool on a wire rack and then ENJOY!


Monday, September 15, 2008

Tasty Tools: Bakeware - Low Fat Pumpkin Muffins

This month's Tasty Tools hosted by Joelen's Culinary Adventures, is bakeware.  Since everyone seems to be catching the Fall bug I decided to use my muffin pans and make Pumpkin Muffins.  This is my first time participating in the event (actually any event that has been advertised on the WC board) so I am very excited!

Okay so let's get to the muffins.  I have been trying to cut calories lately so these muffins are actually low fat and were inspired by a Weight Watchers friendly recipe that a friend told me about a few years ago.  The original recipe was good and extremely easy but I just wasn't crazy about the texture; they were very dense and the tops were always gooey.  I decided to do a little research and attempt to make the recipe a little more pleasing without making it unhealthy.  

I was very pleased with the outcome.  The muffins have more of a cake like texture and do a better job of resembling a full-fat muffin.  Pumpkin muffins that you don't feel guilty about eating, what more could you ask for??

Well, you could visit Joelen's Culinary Adventures to see a ton of other delicious recipes in the Tasty Tools September Round-Up! 
  
In they go!  I have to give the Tasty Tools a spotlight too.

A hill of pumpkin yumminess.


Low Fat Pumpkin Muffins
1 box of spice cake mix
1/2 cup instant oats
1 15 oz. can of pumpkin
1 to 2 egg whites
3/4 cup water (or milk)
1 tsp. vanilla extract

Preheat oven to 350 degrees.  Combine cake mix and instant oats.  Add pumpkin, egg whites, water (or milk) and vanilla extract.  Mix until well combined.  
Line your muffin pans with paper liners (I suggest spraying the liners with a little cooking spray since the recipe has no oil in it).  Fill the liners 3/4 of the way up.  Place in oven and bake 20-25 minutes. Recipe should make 24 muffins.

It doesn't get much easier than that!

Tuesday, September 9, 2008

Grandma Smalley's Brownies

We had a family gathering at my husband's grandparent's house this weekend.  When I asked if she wanted me to bring something of course his grandmother said no, we just needed to bring ourselves.  Well, I haven't really done any baking since we moved and I was really itching to get in the kitchen and do what I love most.  I decided to make my grandma's "famous" brownies.  I had asked her for the recipe quite a while ago but never got around to making them.  For as long as I can remember she has always made these brownies for pretty much every holiday or family gathering.  We all always look forward to these brownies (hence why I called them "famous")!  Needless to say they were a hit with my husband's family as well.  The tray was more than half empty before it was even time for dessert.  
I am really glad that everyone enjoyed them as much as I always have.  It is always fun to share a recipe that has been passed down.  Next time around I may even try to put my own twist on them....Greg has already put his request in for adding chocolate chips.  :o)

Marshmallowy Goodness!!

Time for a close-up.  It really doesn't get much better than brownies topped with marshmallow and chocolate icing.  I must say my grandma usually adds nuts as well but since Greg isn't a fan I decided to leave them out.  
Oh and I guess the "it doesn't get much better than this" comment is up for debate due to Greg wanting to add chocolate chips next time.

Grandma Smalley's Brownies
1 cup sugar
1/2 cup butter (softened)
3/4 cup flour
2 eggs
2 tbs cocoa
1 cup nuts (optional - I left them out)
pinch of salt
small marshmallows (about a half a bag)

 Preheat oven to 350 degrees.  Cream sugar and butter.  Add the eggs and mix until combined.  Sift the flour, salt and cocoa together and then add to the egg mixture.  Mix in nuts (if desired).  Line a square cake pan with parchment paper (this isn't necessary but it makes for easy removal - otherwise make sure to grease your pan).  Pour batter into the pan.  

Bake at 350 degrees for about 25 minutes (33 minutes for a glass pan).  When brownies are done remove them from the oven and immediately spread the marshmallows on the top.  You can add a tin foil tent over the pan for a few minutes to make the marshmallows melt nicely but it isn't necessary.
Let cool and cover with icing (recipe follows).

Chocolate Icing
1/4 cup butter (softened)
2 cups confectioners sugar
2 tbs cocoa
2-4 tbs half & half (I didn't have any so I used milk and it worked fine)

Mix the butter sugar and cocoa in a bowl until it starts to combine.  Add two tbs. of half & half and mix well.  Add additional half & half until you reach the correct consistency.


Friday, September 5, 2008

Puffs of Sweetness

Well they may be puffs of sweetness if someone else makes them!  Sadly I don't think I am cut out to make meringues.  My husband and I have been trying to get back into shape and back into the routine of eating healthy.  I saw Ellie Krieger make these Chocolate-Almond Meringues on her show the other day and thought they would be a perfect (low fat) sweet treat for us.  I made a first attempt at them last week and they completely flopped.  I cooked them for 40 minutes at 250 degrees as the recipe instructed.  Once they cooled they became super sticky and soggy.  Yuck!
I didn't want to let them defeat me so I asked the girls on the WC Nest board about their experience with meringues and I referred to a few other recipes.  I decided to try the route of heating the oven and then turning it off when I put the meringues in and leaving them in for a few hours.  When I took them out I could tell they weren't done so I put them in the oven at 250 for another 30 minutes and then let them stand in the oven for quite a while again after I turned it off.  When I first took them out they were PERFECT!!  I was so happy and thought I finally had a success.  Well, to my disappointment they weren't as perfect the next day.  :o(  They aren't as soggy as the first time but they aren't crispy like they should be either.  I think I am going to give the meringue making up now.  I have posted the recipe below in case anyone else would like to take a crack at it.  Please let me know if you have any better success!
  

Chocolate-Almond Meringues
3 egg whites
1/4 tsp. cream of tartar
1/3 cup superfine (caster) sugar*
3/4 tsp. almond extract
2 oz. semi-sweet chocolate (chopped)

Preheat oven to 250 degrees F.  Line a baking sheet with parchment paper and set aside (I actually had to use two baking sheets).  Place egg whites and cream of tartar in a clean, dry bowl of a stand mixer and beat until foamy (I used my hand mixer).  Add sugar and almond extract, beat until meringues hold soft peaks, about 3 minutes.  Fold in chocolate gently until just incorporated.  Using a pastry bag or a sealable plastic bag with the corner snipped off, pipe meringue by the tablespoon onto cookie sheets.  Bake for 40 minutes, then remove from oven and let cool completely before removing from parchment paper.  Transfer to an airtight container.

*You can make your own caster sugar by pulsing granulated sugar in a food processor for 30-40 seconds.

Thursday, September 4, 2008

Our New Kitchen!

My husband and I just relocated to Fort Lauderdale which means we are also renting a new home.  We found this beautiful new townhouse which is perfect for us and the best part about it is....the kitchen!  So, I thought I would introduce you to the new place that my dishes and recipes will be coming from.
In the past I have had small kitchens that I hated to cook in because there was just no room.  Not to mention the amount of space I had to store all of my dishes, appliances, etc.  Now I have this nice spacious kitchen with an island and lots of cabinet space.  I am such a happy little cook.

The island is my new best friend.  It makes prep work so much easier and less messy.  I am still in amazement that I actually have counter space.

I even have a little area over there in the corner to keep all of my cookbooks and cooking magazines.  I used to have to keep them in our office.

The one downfall is that we had to go back to an electric stove.  :o(  I miss my gas stove so much.  I have to admit that this is a pretty decent flat top but it still takes so much longer for things to heat up and it is impossible to regulate the temperature.  I guess I can't have everything though.

I actually have cabinet space.  There is a nice organized spot for everything.  I can actually use all of my dishes, pots/pans, utensils and appliances without having to dig for them.  I actually know what I have now.

I told my husband that now when we go to buy a house next year there is NO downsizing with the kitchen.  There is no way I could go back to something smaller now.  :o)

Monday, July 14, 2008

Chocolate and Raspberry...I am in Love

Lately my whole family has been trying to watch what they eat in hopes of taking off a few pounds. Nowadays who isn't, right? A few weeks ago I came across this recipe on cookinglight.com and was hoping to find a reason to try it. This past weekend we celebrated my mom's birthday and of course I volunteered to make a cake. I am always looking for a valid excuse to bake but not have to keep it in my house. :o) I remembered this cake and of course it took me forever to find the recipe again. Finally I found it and went to work on creating my masterpiece. It was fairly easy to make and it was oh so good. My mom later told me that my step-dad raved over it, she had to send a second piece home with my sister's boyfriend and she herself snuck back out to the kitchen in the middle of the night to have a second piece. I guess it was a hit! The plus side is that it was a tad bit healthier than your typical cake. The recipe was originally for a Raspberry-Almond Torte but when I saw the price for the almond paste I quickly decided to make it Raspberry-Vanilla instead, lol. I was planning on taking a picture of a cut piece but I completely forgot once we got to my parent's house. Sorry, but this is the only crummy picture that I have. If you click on the link for the cooking light recipe you can see the pretty picture that they have.
Raspberry-Vanilla Torte with Chocolate Ganache
Cooking spray
6 tbs. butter, softened
1 1/2 tsp. vanilla extract
1 cup granulated sugar, divided
3 large eggs
3/4 cup all-purpose flour
1/4 tsp. salt
4 large egg whites

Filling:
1/4 cup fresh lemon juice
1 (10-ounce) jar seedless raspberry jam
1/2 cup powdered sugar, sifted

Ganache:
1/2 cup granulated sugar
1/4 cup unsweetened cocoa
1/3 cup fat-free milk
1 (4-ounce) bar semisweet chocolate, chopped
Preheat oven to 350°.

Coat a 15 x 10-inch jelly roll pan with cooking spray (it took me a little while to realize that this was basically a cookie sheet); grease the pan and then line bottom with parchment paper. Coat parchment paper with cooking spray.

To prepare cake, place butter and vanilla extract in a large bowl; beat with a mixer at medium speed 2 minutes or until blended. Add 1/2 cup granulated sugar, beating until well blended (about 3 minutes). Add eggs, 1 at a time, beating well after each addition.
Lightly spoon flour into dry measuring cups; level with a knife. Combine flour and salt, stirring with a whisk. Add flour mixture to butter mixture, beating just until combined.
Place the egg whites in a large bowl. Using clean, dry beaters, beat egg whites with a mixer at high speed until foamy. Gradually add 1/2 cup granulated sugar, 1 tablespoon at a time, beating until stiff peaks form. Fold egg whites into batter; pour batter into prepared pan.

Bake at 350° for 18 minutes or until cake springs back when touched lightly. Cool. Invert cake onto a wire rack. Remove parchment paper. Cut cake into 4 (10 x 3 3/4-inch) rectangles.

To prepare filling, combine juice and raspberry preserves, stirring with a whisk. Add powdered sugar, stirring until smooth. Reserve 3/4 cup raspberry mixture. Place 1 cake rectangle on a cake platter; spread with 1/4 cup raspberry mixture, leaving a 1/4-inch border. Repeat procedure with remaining cake and 1/2 cup raspberry mixture, ending with cake.

To prepare ganache, combine 1/2 cup granulated sugar, cocoa, and milk in a medium saucepan over medium heat; bring mixture to a boil, stirring frequently. Cook 1 minute, stirring constantly. Remove from heat, and add chocolate, stirring until smooth. Spread ganache evenly over top and sides of cake; let stand 20 minutes or until set. Serve reserved raspberry mixture with torte.

Friday, June 20, 2008

What to do with the buttermilk..

I decided to make a red velvet cake for Father's Day this year (I'll blog about it as soon as I get the pictures from my mom). The recipe called for buttermilk and as I went shopping for the ingredients I found out that I couldn't buy just a small container of buttermilk, I had to buy a whole liter. Now what do I do with the 3 cups of buttermilk I have left in my refrigerator?? I went to the ladies on the What's Cooking board to see if they had any tried and true recipes that call for buttermilk. I received four or five recipes that all sounded great so I then had to figure out which to make. Since I would be making this on a weeknight after work (which means I will be exhausted) I decided to go with one that would be the least messiest and the least amount of work. I went with a pound cake. Thanks to thatgirlang I ended up with a great cake that was a crowd pleaser at work. Thanks Angie! This also gave me the opportunity to use a pretty bundt pan that I received as a bridal shower gift and completely forgot I had.
I have been trying to experiment and be more creative in the kitchen rather than always following recipes word for word, so I took her base recipe for the cake and modified it a tiny bit. Since the cake had lemon extract in it I decided to add some lemon zest as well. I also seem to find that pound/bundt cakes can be a bit bland for my taste so I chose to add a cream cheese glaze to it. I crossed my fingers that it would all turn out okay in the end and luckily it did. I was also so excited that my cake came out of the pan perfectly! I was a little worried because of the design aspects of the pan but I guess all of the greasing and flouring paid off, whew!
It was a delicious cake; very moist and tasty. It is a perfect cake to serve during breakfast or brunch because it isn't terribly sweet. Everyone kept complimenting on how beautiful it was. I couldn't take much credit on that though...the pan did all of that work, lol. ; )

Buttermilk Pound Cake with Cream Cheese Glaze
adapted from Angie's recipe at Angie's Simple Cooking
3 cups all-purpose flour, sifted
1/4 tsp. baking soda
1/2 tsp. salt
1 cup butter
3 cups white sugar
6 eggs
1 tsp. lemon extract
1 tsp. vanilla extract
1 cup buttermilk
zest of 1 lemon
cream cheese glaze (recipe follows)

Preheat oven to 325 degrees F. Grease and flour one 9 or 10 inch tube pan. Mix together the flour, baking soda and salt. Set aside.
In a large bowl, beat butter with sugar. Mix in the eggs, one at time, beating well after each addition. Stir in the lemon and the vanilla extracts. Gently mix in flour mixture alternately with the buttermilk. Stir in the lemon zest. Pour batter into the prepared pan.
Bake in preheated oven for 90 minutes. Keep an eye on it though because mine was done in 75 minutes. Do not open oven door until after one hour. When cake begins to pull away from the side of the pan it is done. Let cool in pan for 10 minutes, then turn out onto a wire rack and cool completely.
Note: I ended up moving the oven rack to the notch just under the center because as the cake started to rise it got a little too close to the top of the oven and I was afraid it would burn.


Cream Cheese Glaze
adapted from Martha Stewart's Baking Handbook
4 oz. cream cheese, softened
1/2 cup confectioners' sugar, sifted
pinch of salt
1 tbs. freshly squeezed lemon juice (I added an additional 1/4 tsp.)
3 tbs. milk
1 tsp. lemon zest (about 1/2 of a lemon)

Beat together the cream cheese, sugar and salt until all is incorporated. Add the lemon juice and milk, mix well. Stir in the lemon zest. Pour over the cooled cake.
Note: If the glaze is too think, add milk 1 tsp. at a time.

Wednesday, June 18, 2008

A California Treat

My husband was on a business trip in San Diego recently and fell in love with Wahoo's fish tacos. He ate there two or three times in the 5 days he was there. Not long after that I was flipping through my Ellie Krieger cookbook (The Things You Crave) and came across a recipe for fish tacos which reminded me of his experience in California. So, we decided to bring a bit of Cali back to Florida and make our own fish tacos. It is always nice to find new ways of incorporating fish into our meals and this was definitely a winner. We agreed on grilled snapper for the tacos with the chipotle cream from Elllie Krieger's version and a side of black bean soup. I would like to mention that Greg cooked the fish and created the black bean soup. He is a very good cook and contributes to our meals just as much as I do so this won't be the last time I mention his dishes.

Fish Tacos
(the amount of ingredients used will easily feed two people)

2 (6 oz) pieces of red snapper (or any fish of your choice)
4 soft taco sized tortillas (we used whole wheat)
salt
pepper
lime juice
chipotle cream (recipe follows)
Toppings of your choice - we used cabbage, diced tomato, diced red onion and salsa. Keep in mind that fish tacos are generally topped very simply.

Season both sides of the fish with salt and fresh ground pepper. Place in a grill pan over medium-high heat until fish is cooked through (flipping once). Remove from pan and top with fresh squeezed lime juice. Cut fish into strips and place in tortilla. Finish off with your preferred toppings.

Chipotle Cream
courtesy of Ellie Krieger, The Food You Crave
1/2 cup plain non-fat yogurt
2 tbs. mayonnaise
2 tbs. chipotle pepper in adobo sauce, chopped

In a small bowl combine all ingredients. Her recipe is complete at this point. I decided to add salt and pepper to taste and blend in our Magic Bullet (or food processor). I felt that this gave it much better flavor and a better texture.
Note: This sauce is fairly spicy so you may adjust the amounts to your liking.

Simple Black Bean Soup
(depending on portion size this will feed 2-3 people)

1/2 medium onion, chopped
1 clove of garlic, minced
1 16 oz. can of black beans
1 1/2 cups of chicken broth
1 bouillon cube
1 tsp. oregano
1 pinch crushed red pepper (or to your taste)
salt
pepper

In a saucepan saute the garlic and onion until translucent. Use a fork to slightly mush some of the beans in their can and then add to the pan. Add the chicken stock and bring to a simmer. Add the bouillon cube, oregano, crushed red pepper and salt & pepper to taste. Let simmer 5-10 minutes, stirring frequently. Garnish any way you like (chopped tomato, chopped red onion, etc.).

Monday, June 16, 2008

Is it a brownie or a cookie? Who Cares!

Recently we found out that my husband, Greg, would be getting a promotion and we would be relocating from Tampa to Miami. Well, he had their poor office coordinator scanning the calls from the moving companies he was getting estimates from. Greg told her he would make it up to her by buying her snacks from the vending machine the rest of the week. Men!! When he told me this I quickly volunteered to make her a homemade treat instead. Not really knowing what she liked, except for chocolate, I began going through my recipes. I came across Double Chocolate Brownie Cookies in my Martha Stewart Baking Handbook. I had already made one successful cookie from her book so why not try another.
I went through the whole process of following the recipe exactly. After getting all of my ingredients combined I had a nice semi-thick batter. The only problem was....the recipe said to take spoonfuls and roll them into balls. If I took what I had and did that I would have had a big blob of batter in my hand and there was no way it was going to roll into a ball. I went back and re-read the recipe to be SURE that I did everything correctly and that it didn't say to let the batter stand or refrigerate. I did everything right and there was nothing that said to do anything more with the batter after it was all combined. Hmmmm....now what?
I decided to try and refrigerate it for a little while. It helped a bit but not much. I let it sit on the counter for a little while and it also helped a bit but there was still no way it was going to be rolled into balls. Well, what did I have to lose at this point? I decided to just plop the batter down into little mounds on the cookie sheet and see what happened.
I was very pleased to see that they turned out fine. They were delicious (very decadent) and had that nice soft consistency of a brownie, YUM! In the end I had a success and everyone at Greg's work loved them! They wanted me to make more over the weekend for Monday, lol.

Double Chocolate Brownie Cookies
courtesy of Martha Stewart's Baking Handbook
9 oz. semi-sweet chocolate, chopped into 1/4 inch chunks
3 oz. unsweetened chocolate, coarsely chopped
6 tbs. unsalted butter
1 cup sugar
3 large eggs
1/2 tsp. pure vanilla extract
1 cup sifted all-purpose flour
1/4 tsp. salt
3/4 cup (about 3 oz.) chopped walnuts (optional) - I chose to omit these

Preheat your oven to 375 degrees. Line two large baking sheets with parchment paper and then set aside. In a heatproof bowl set over (but not touching) simmering water, melt 5 ounces of the semisweet chocolate, all of the unsweetened chocolate and the butter. Stir until smooth. Set mixture aside to cool for about 5 minutes.
In the bowl of an electric mixer fitted with the paddle attachment, beat the chocolate mixture and sugar on medium speed until well combined, about 3 minutes, scraping down the sides of the bowl as needed. Add the eggs and mix until completely combined. Beat in the vanilla. Add the flour and salt, and beat until just incorporated. Stir in the remaining 4 ounces of semi-sweet chocolate and the nuts, if using.
Shape 2 tablespoons of dough at a time into 1 1/2 inch balls and place about 1 1/2 inches apart on the prepared baking sheets. Bake, rotating sheets halfway through, until edges are set and centers are still a bit soft, 9 to 11 minutes. Transfer parchment and cookies to a wire rack to cool completely.

Note: I used a hand mixer which may be why the consistency didn't turn out the way it should have.

Peanut Butter + Bananas = Tasty Muffin

I had two pitiful bananas dangling from their little banana hanger in my kitchen. Normally I would be wasteful and throw them away because as much as I would like to, I don't bake on a regular basis due to the fact that I don't need the indulgent food in my house. As I have mentioned before, the skinny gene is not a friend of my family. So, I am not one of those people who generally holds onto their ripe bananas. Well, I guess the What's Cooking board that I frequent must be wearing off on me because instead of tossing them I was determined to find a recipe to use them in. I figured I would treat my coworkers to a Friday sweet. I searched for banana bread recipes (of course the first thing that came to mind) but most of the recipes I found called for more than two bananas. Just when I thought I was going to have to get really creative I logged onto the WC board and there just happened to be a blog update from angelashley titled Peanut Butter Banana Muffins. I checked out the recipe and to my delight it only called for two bananas, YAY! My two little bananas wouldn't have to go to waste. It was obviously meant to be that I make these lovely little muffins. I was also itching to use my new silicone baking cups. :o)
If you aren't a fan of super sweet things in the morning then this recipe is perfect. They have a very mild sweetness even with the streusel topping. My coworkers loved them.


Peanut Butter Banana Muffins
1 cup all purpose flour
3/4 cup quick cooking oats
1/3 cup packed brown sugar
1 tbs. baking powder
1 cup milk
1/2 cup peanut butter
1/2 cup mashed ripe banana
1 egg, beaten
2 tbs. vegetable oil
1 tsp. vanilla extract

1/4 cup all purpose flour
2 tbs. butter, melted
2 tbs. packed brown sugar

Preheat your over to 375 degrees. Grease 12 muffin cups or line with muffin liners (I used silicone cups and they were great). Combine 1 cup of flour, quick cooking oats, 1/3 cup brown sugar and baking powder. Whisk together milk, peanut butter, mashed banana, egg, oil and vanilla.
Add banana mixture to dry ingredients, mixing just until moistened. Fill the prepared muffin cups 3/4 full.
In a small bowl, stir together 1/4 cup flour, melted butter and 2 tbs. of brown sugar. Sprinkle the topping evenly over the muffins.
Bake in preheated oven for 18 minutes, until golden brown. Best served warm (but everyone enjoyed them room temperature as well).

Note: I actually got about 15 or 16 muffins out of the batter.

Thursday, June 12, 2008

A Healthy Lasagna?

I love to cook Italian food.  Lucky for me my husband equally loves to eat Italian food. Unfortunately neither of us has the naturally skinny gene and Italian food isn't usually the least fattening of things to cook.  Once again I turned to Cooking Light as a resource to get my wheels spinning.  I found a great recipe that I was able to tweak to fit to our tastes.  You can imagine my happiness to be able to create a great tasting, low fat/cal lasagna that we don't have to feel guilty about eating.  Bring on the seconds!

Vegetable Lasagna
1 teaspoon olive oil
3/4 cup chopped spinach
1 cup chopped zucchini
1/2 cup sliced carrot
1/2 cup chopped red bell pepper (or any color you have on hand)
1/2 cup thinly sliced red onion
26 ounces of your favorite (tomato) pasta sauce
2 tablespoons commercial pesto (feel free to use your own)
1 (15 oz) container part-skim ricotta cheese
cooking spray
6 hot cooked lasagna noodles, cut in half
3/4 cup (3 oz) shredded part-skim mozzarella cheese

Preheat oven to 375 degrees.

Heat the oil in a medium saucepan over medium heat.  Add the spinach, zucchini, carrot and bell pepper.  Cook for five minutes, stirring frequently.  Add pasta sauce and bring to a boil. Reduce heat and simmer for 10 minutes.
Combine the ricotta and pesto in a small bowl.  Spread 1/2 cup of the tomato mixture in the bottom of a 8 inch square baking dish coated with cooking spray.  Arrange 4 noodle halves over tomato mixture.  Top noodles with half of the ricotta mixture and 1 cup tomato mixture. Repeat layers, ending with noodles.  Spread remaining tomato mixture over noodles; sprinkle with mozzarella.  
Cover and bake at 375 degrees for 30 minutes.  Uncover and bake an additional 2o minutes. Let stand for 10 minutes.
Note:  I placed baking dish on top of a cookie sheet to prevent spillage in the oven.

Cookie with a Zing

We were having a Memorial Day potluck at work and I wanted a great dessert.  After a winter season of heavy, rich desserts I really wanted something light and fruity.  I also wanted something that wasn't too time consuming or labor intensive since I would have to prepare it when I got home from work.  
During this same time I had just purchased a new baking cookbook, Martha Stewart's Baking Handbook.  While flipping through it I found just the recipe I was looking for, Lime-Glazed Cookies.  Sweet, tart and oh so good.  

Lime-Glazed Cookies - makes about 3 dozen
Martha Stewart's Baking Handbook


Bring on the Cheesecake Bars!

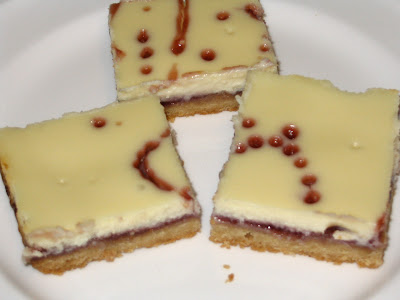
Raspberry and cheesecake combined...it doesn't get much better than that!  Or does it?  How about adding a shortbread crust into the mix.  All I can say is, YUM.  This is a great dessert for Spring and Summer, or any time of the year for that matter.  It's simple, easy to transport and it tastes great.  Sounds like my kind of dessert.


Raspberry Cheesecake Bars
16 oz. cream cheese, softened
2 large eggs
3/4 cup sugar
1 tsp. vanilla
3/4 cup raspberry preserves (you can switch this out with your favorite flavor)
hot shortbread base (recipe follows)

Preheat oven 350 degrees.

In a bowl whisk cream cheese until smooth then whisk in eggs, sugar and vanilla.  Evenly spread preservers over hot shortbread and pour cream cheese mixture over it.  You may also choose to melt a small amount of the preserves in the microwave and drizzle over the top for a little extra visual. Bake in the center of oven until slightly puffed, about 30 minutes.  Cool completely in pan and then cut into 24 bars.
*Note:  I lined my pan with parchment paper to make for easy removal.

Shortbread Base
1 1/2 sticks (3/4 cup) unsalted butter
2 cups all-purpose flour
1/2 cup packed like brown sugar
1/2 tsp. salt

Preheat oven 350 degrees.

Cut butter into 1/2 inch pieces.  In a food processor, process all ingredients until mixture begins to form small lumps.  Sprinkle mixture into a 13 by 9 by 2 inch baking pan, press evenly onto bottom.  Bake shortbread in the center of the oven until golden brown, about 20 minutes.

My First Barefoot Contessa Recipe

I started watching the food network on a regular basis about five years ago and I have to admit that I was not a fan of Barefoot Contessa. I think it may have had to do with the fact that I was a poor college kid through most of that period and her recipes didn't appeal to my style of cooking at the time or my pocketbook for that matter. About a month ago, on a Saturday morning, I found myself sucked into a Barefoot Contessa marathon. Before I knew it I was very much attracted to her recipes. One in particular stood out to my husband and I both.....the Scallops Provencal with Herbed Basmati Rice. It looked so fancy and decadent but yet simple at the same time. Not too long after this my husband had to go out of town for a whole week so I decided to cook him and extra special dinner upon his return. He had been subjected to sub-par restaurant food during his trip so I knew he wouldn't object. I figured this would be the perfect time to try the recipe we had been eyeing.
After picking up the ingredients I went to work on my romantic dinner. It was surprisingly easy for as pretty as it looks when complete. The only issue I ran into was it took a while for my scallops to brown up since I was using a non-stick pan. Note to self: next investment is a good stainless steel pan for browning.
In the end it was SO good and we both thoroughly enjoyed it. Mission accomplished!

Scallops Provencal
1 pound fresh bay or sea scallops (I used sea scallops)
Kosher salt and freshly ground black pepper
All-purpose flour, for dredging
4 tablespoons (1/2 stick) unsalted butter, divided
1/2 cup chopped shallots
1 garlic clove, minced
1/4 cup chopped fresh flat-leaf parsley leaves
1/3 cup dry white wine
1 lemon, cut in 1/2

If you're using bay scallops, keep them whole. If you're using sea scallops, cut each 1 in half horizontally. Sprinkle with salt and pepper, toss with flour, and shake off the excess.

In a very large saute pan, heat 2 tablespoons of the butter over high heat until sizzling and add the scallops in 1 layer. Lower the heat to medium and allow the scallops to brown lightly on 1 side without moving them, then turn and brown lightly on the other side. This should take 3 to 4 minutes, total. Melt the rest of the butter in the pan with the scallops, then add the shallots, garlic, and parsley and saute for 2 more minutes, tossing the seasonings with the scallops. Add the wine, cook for 1 minute and taste for seasoning. Serve hot with a squeeze of lemon juice.
~~~~~~~~~~~~~~~~
Herbed Basmati Rice
1 cup uncooked long-grain (white) basmati rice
1 3/4 cups water
3/4 teaspoon kosher salt
1 tablespoon unsalted butter
2 tablespoons minced fresh curly parsley leaves (I used flat leaf parsley)
1 tablespoon minced fresh dill leaves (I left the dill out)
1 tablespoon minced fresh scallions, white and green parts
Pinch freshly ground black pepper

Combine the rice, 1 3/4 cups water, the salt and butter in a small heavy-bottomed saucepan. Bring to a boil over high heat; reduce the heat to low, stir once and simmer, covered tightly, for 15 minutes. (You may need to pull the pot half off the burner to keep it from boiling over.) Turn off the heat and allow the rice to sit covered for 5 minutes. Add the parsley, dill, scallions, and pepper. Fluff with a fork, and serve warm.

Wednesday, June 11, 2008

Easy and Yummy!

I am always trying to find recipes that are healthy but not boring. I mean I can only eat so much grilled chicken with a veggie and cous cous! I never knew about the Cooking Light website until I started posting on the WC board. Now it is a great resource for me to find new and exciting recipes that are still healthy. The first recipe I found and tried was Lemon Chicken and Rice with Artichokes. Lucky for me it was a hit with both my husband and I. It is so quick and easy and who can resist a one pot dish? This will definitely be a repeat on our list of weeknight meals.


Lemon Chicken and Rice with Artichokes, courtesy of Cooking Light
1 pound skinless, boneless chicken breast, cut into 1/2-inch strips
2 1/4 cups chopped onion
1 cup chopped red bell pepper
2 cups instant rice (I used brown rice)
1/4 cup fresh lemon juice
1/4 teaspoon salt
1/4 teaspoon black pepper
1 (14-ounce) can fat-free, less-sodium chicken broth
1 (14-ounce) can quartered artichoke hearts, drained
2 tablespoons grated Romano cheese (I left the cheese out)

Heat pan with cooking spray or a little olive oil over medium-high heat. Add the chicken, chopped onion and red bell pepper; sauté 5 minutes. Stir in rice, lemon juice, salt, black pepper and broth; bring to a boil. Cover, reduce heat, and simmer for 15 minutes or until rice is tender. Stir in artichokes and cook 1 minute or until heated through. Sprinkle with cheese if desired.

Let's try this again..

Okay, so as you can see from the date of my first post, I started this blog a while ago and it hasn't made it very far since. All of the WC ladies have such great blogs; I kind of became a bit intimidated and thought that maybe I wasn't cut out for this whole blog thing since I had absolutely no clue how it all worked. I have decided that I am going to get over the fear and do it anyway, lol. I want to be able to share my recipes too. I feel kind of selfish always seeing everyone's wonderful recipes and ideas without sharing my own. So, over the next couple of days I will be adding the recipes and photos I have been accumulating over the past couple of months. My poor husband has been such a trooper in helping me photograph my dishes (with my stinky camera). I think he is probably wondering how long I am going to continue taking pictures of my food without having a blog, lol.
So without further adieu.......My blog! :o)

Monday, March 10, 2008

My First Post!

I am so excited to start my food blog. I have acquired such a passion for cooking and learning new things over the past few years. My husband was the first to spark my enthusiasm in cooking and then The Food Network took it to a whole new level. I never thought that a cooking network would supply me with countless hours of entertainment. It is one of the only channels I watch anymore. You can imagine my excitement to register for all new kitchen stuff when my husband and I got married this past November. Now if I only had room in our small kitchen to store it all....I can't WAIT to buy a home and have a big kitchen again!

I am a first timer at this whole blog thing so bare with me as I learn. I think this will be a great tool for keeping all of my recipes archived and a place of inspiration when my hubby and I are having one of those nights where we don't know what to cook for dinner. We are both very indecisive so you can imagine what a task that can be at times.

Well, I hope you enjoy....I am looking forward to sharing mine and my husbands recipes and learning many more from others.